What is marking?
Basic manufacturing processes are among the introductory topics in machining. The process of drawing the relevant part drawing onto the actual workpiece, with the correct features, is called marking (layout) . The purpose of marking is to create the marks and lines that allow machine parts to be machined in accordance with the part drawing. It ensures that workpieces are machined accurately and easily.
Importance of the Reference Surface
Before starting the marking process, a proper reference surface must be established to ensure accurate measurements.
Use of Marking (Layout) Fluid
Marking (layout) fluid applied to metal surfaces makes the scribed lines appear more clearly.
Role of the Center Punch
The center punch marks the points where holes are to be drilled, preventing the drill bit from wandering off center.
Marking (Layout) Tools
Marking (surface) plate
These are tables or slabs made of ribbed cast iron with flat working surfaces on which marking is carried out.

Since the surface must remain flat for marking to be accurate, operations such as drilling, cutting, punching, or hammering are not carried out on the surface plate. Any action that could damage the surface plate is avoided.
V-blocks

V-blocks are generally used to make marking cylindrical parts easier. Because of their weight, they can also be used as a support during the marking process.
Steel Rulers

Besides being used for measuring during marking, rulers are also used to draw straight marking lines on workpieces. The steel ruler is one of the most commonly used marking tools.
Number/Letter Stamps

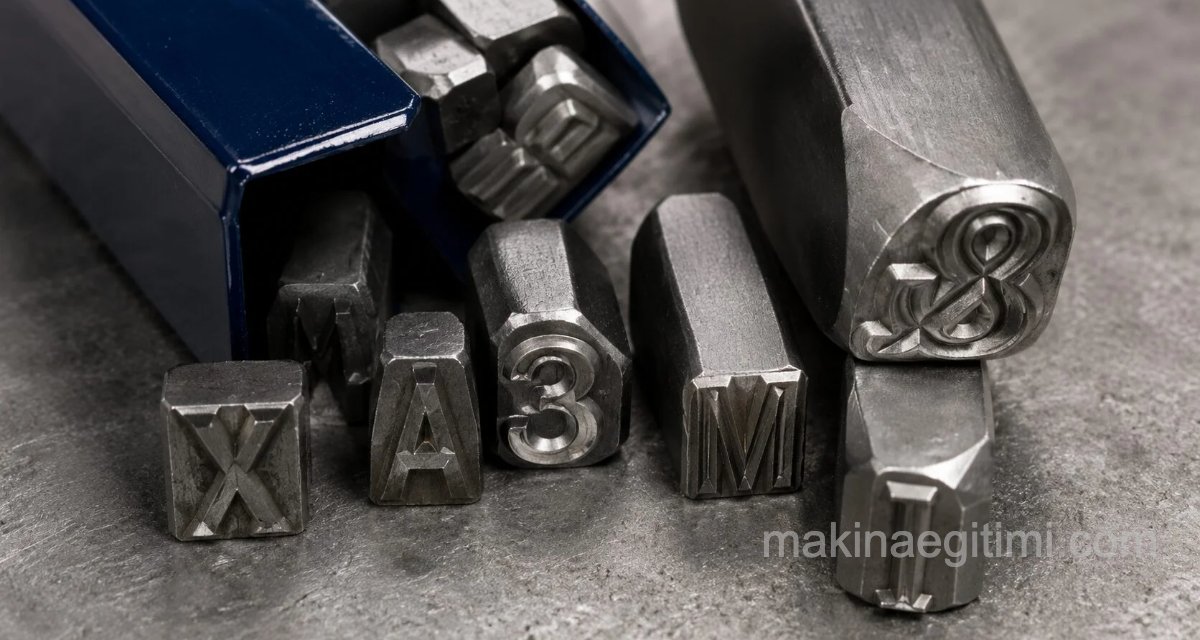
Number/letter stamps are hardened metal bars with a number or letter formed on one end. By striking them with a hammer, they are used to punch a permanent number or lettering onto metal workpieces.
Scribers
Scribers are used to draw lines on metal surfaces during marking. Their bodies are made of soft steel, while their tips are made of alloy steel or diamond and hard-brazed onto the body. Tip angles range from 10 to 30 degrees. Scribers should not be carried in apron pockets and should not be used as a prick punch.
Height Gauges
Height gauges are used to draw parallel lines at a desired dimension during marking. They are one of the most important marking tools. There are simple vernier and precision (digital) indicator versions of height gauges.

NOTE: For a sample workpiece marking example on the use of a height gauge, see:
SEE ALSO: Clamping Shoe Exercise Manufacturing Stages
Dividers
Dividers are used to draw circular lines during marking. Pressure should be applied on the pivot (center) leg of the dividers. If pressure is applied on the scribing leg instead, the dividers will slip.

To use dividers on a hole, the hole is filled with a wooden plug.
Prick Punch / Center Punch
The prick punch: used to make small dents so that marking lines are not lost and to determine the centers of holes to be drilled, and also to guide the drill bit. It is made of chrome or vanadium steel.

There are two types of punches. One is the center punch, prepared to guide the drill into holes (with a tip angle of 90 degrees). The other is the prick punch, used so that marking lines are not lost during work and to mark edge lines. Its tip angle is 60 degrees.
When striking the punch, it is first held at an angle so the marking lines can be seen. It is then straightened upright and struck with a hammer.

The punch marks should not deviate from the centerline of the marking lines. Punch marks should be struck close together on curved lines and spaced farther apart on straight lines.
An additional control circle should also be drawn for precise marking of holes. The control circle serves to show whether the hole being drilled will be centered or not.

In the sample workpiece above, the areas where holes are to be drilled have been marked with punch marks, which serve to guide the drill bit into position.
Bevel Protractor

Hammer
A hammer is a striking tool made of steel with both ends hardened. It is used in weights of 50, 75, 100, 150, 200, 250, 300, 400, and 500 grams.
Centering Square
Centering square: used to draw lines passing through the center of cylindrical parts.

Centering Bell
Centering bell: used to determine the centers of cylindrical parts from their face surfaces.

Marking (Layout) Dyes
A marking dye is chosen based on the properties of the surface. Coating a surface with dye makes the marking lines easier to see.

Copper sulfate powder, also known as “bluestone” in manufacturing, is used as a marking dye. Copper sulfate is normally blue in color. When mixed with water and applied to a metal surface, it produces a reddish-brown (copper-colored) finish.

Ready-made marking dyes are also available for purchase. Thanks to properties such as fast drying, protecting the metal from rust, and being unaffected by oil, these dyes are especially suitable for die and mold makers. They must be stored carefully, as they are flammable.
How is marking done?
Order of Operations in Marking:
- Any burrs on the workpiece are removed,
- Surfaces to be marked are coated with marking dye,
- The workpiece is placed on the surface plate,
- Axes and centers are drawn first and marked with the punch,
- The drawing is then transferred onto the part,
- The marking is checked.
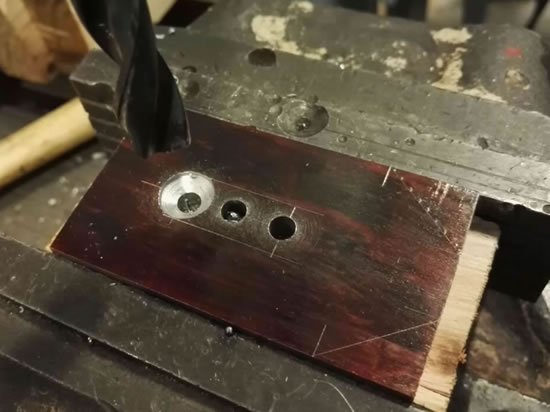
On the clamping shoe workpiece, the area where a hole is to be drilled and an elliptical channel is to be formed has been marked out with marking lines and punch marks. Likewise, the angled section visible on the right side of the part has also had its boundaries defined with marking lines.
Copper sulfate (bluestone), mixed with water and used for marking purposes, colors iron and steel objects copper-colored when applied to their surface
Copper sulfate (bluestone) is used for coating cleaned steel surfaces. Bluestone colors the surfaces copper.
In this article, we defined marking. We examined marking tools. We explained how marking is done.
Related Questions
Lines drawn on a bright metal surface can sometimes be hard to see. Marking fluid creates a dark background on the surface, making the lines drawn on it much more visible and easier to read.
On an unmarked surface, the drill bit can easily wander away from the intended point as drilling begins. The small dent made by the center punch fixes the drill bit at the correct point and prevents this wandering.
Related Posts