When a machine part reaches the point where it can no longer do its job, the need for a replacement part arises. For the replacement to do that job properly it has to be identical to the original. That is why spare parts are made in series, to the same dimensions as the original, so that they can simply be fitted. Checking the dimensions of spare parts regularly is indispensable for keeping quality and standards in production.
Because parts are machined while rotating on a lathe, checking diameters in series matters a great deal. Caliper gauges are used for a rough check of diameters, and limit gauges for precise, standard checking. In this article we look at the main types of caliper used for measurement and inspection in turning, the techniques for using them correctly, and the measuring mistakes that are made most often.
The Basic Tools Used for Measuring Diameters
Caliper gauges are used for a rough check of diameters, while limit (snap) gauges are preferred for precise, standard checking.
Caliper gauges give a simple, quick first check, whereas a limit gauge lets you confirm quickly and objectively whether a part falls within a given tolerance band.

Using the Vernier Caliper
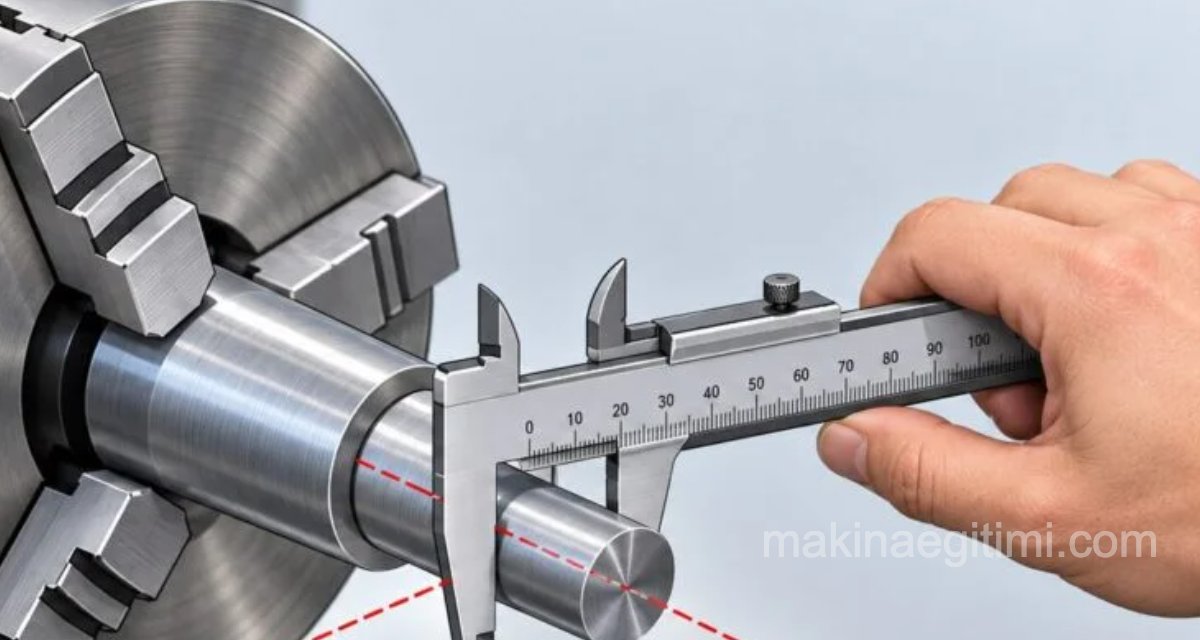
One of the measuring tools used most in turning work is the vernier caliper. For the measurement to be accurate, the slide of the caliper has to run without play and be well seated. If there is play in the slide, the reading you take will differ from the true value.
In narrow and profiled grooves the jaws of the caliper may not seat fully on the surfaces being measured. In that case, remember that you need a caliper with knife-edge jaw tips. Otherwise the measurement will be wrong and the dimension will read larger than its true value. This is a measuring error that comes up often in narrow geometries such as groove diameters, and it is a hard one to notice.
Caliper Types for Special Measuring Situations
Not every measuring situation can be handled correctly with the same caliper. Different types of caliper should be chosen according to the geometry of the part.
Step caliper: To take a length accurately over shouldered diameters, a step caliper with a sliding fixed jaw should be chosen.
Inside caliper: An inside caliper with cranked jaws can be used to measure the shoulder diameters of bores.
Depth caliper: When measuring a height, the depth caliper must be kept on the axis, that is, parallel to the dimension being measured.
Holding the Caliper According to the Turning Operation
Getting a correct measurement is not only about choosing the right caliper, but also about holding it the right way. Watch the following points when holding a caliper:
- The caliper should be held perpendicular to the turning axis when taking the reading.
- Lengths should be measured parallel to the turning axis.
- The measuring tool should be held in a comfortable, secure position, with no play.

Not holding the caliper perpendicular to the turning axis can lead both to a wrong reading and to the caliper striking the part and being damaged, particularly when measuring on a rotating workpiece. For that reason experienced turners prefer to stop the machine before measuring whenever they can.

How to Avoid Measuring Errors
Bringing the points above together, the errors met most often during measurement and inspection on the lathe, and their remedies, can be summarised like this.
| Measuring error | Cause | Remedy |
|---|---|---|
| The dimension reads larger than its true value | The caliper jaws do not seat fully in a narrow or profiled groove | Use a caliper with knife-edge jaw tips |
| Inconsistent measurement results | Play in the caliper slide | Choose a caliper with a well-seated slide and no play |
| Wrong length measurement | The depth caliper is not on the axis | Hold the caliper parallel to the dimension being measured |
| Incorrect diameter reading | The caliper is not held perpendicular to the turning axis | Position the caliper perpendicular to the axis while measuring |
| The spare part does not match the original | Irregular dimensional checking in series production | Carry out standard checks with limit gauges regularly |
Conclusion
Measurement and inspection on the lathe does more than confirm whether a part is the size it should be; it also keeps quality and standards going in series production. Choosing the right type of caliper, holding it correctly, and staying alert to the measuring errors that can appear in narrow geometries all save time and prevent scrapped work. Learning to use a vernier caliper properly is a basic skill for anyone working in a turning shop.
Frequently Asked Questions
A vernier caliper requires you to read the measurement manually from the vernier scale, while a digital caliper shows it directly on a display. Vernier calipers are still widely preferred in workshop conditions because they need no battery and are more robust.
When the jaws do not seat fully on the surface, the dimension reads larger than its true value. Because this can cause serious errors, especially when measuring narrow and profiled grooves, a caliper with knife-edge jaw tips should be used for such measurements.
When measuring a diameter the caliper should be held perpendicular to the turning axis, and when measuring a length it should be held parallel to it. This distinction depends on the type of measurement and matters for getting a correct result.
A limit (snap) gauge is used to confirm quickly whether a part falls within a given tolerance band. For standard checking in series production in particular, it offers a more precise and faster method than a caliper.
The most common mistake is not keeping the depth caliper parallel to the dimension being measured, that is, on the axis. If the caliper is held at an angle, the height reading comes out wrong.
Related Posts