

Page contents: A dimensioned 3-view drawing of a sample part we can use for solid modeling practice, a ready-titled-block solid model exercise. Video and illustrated walkthrough. This can be useful for reinforcing the use of the Sweep command.
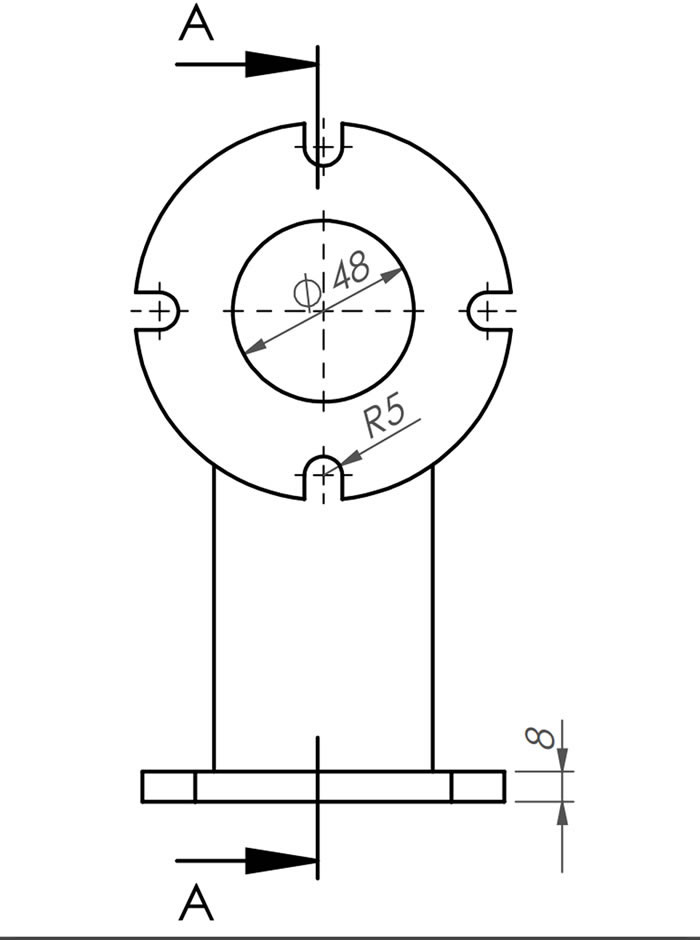
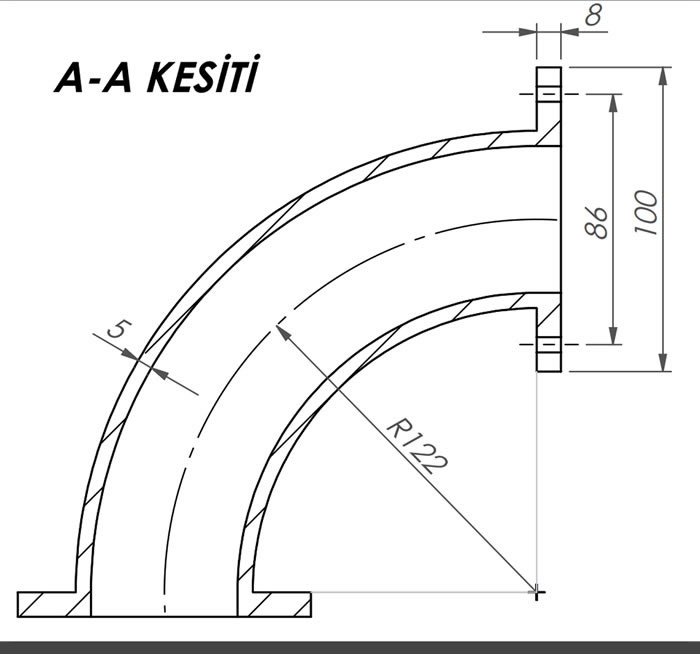
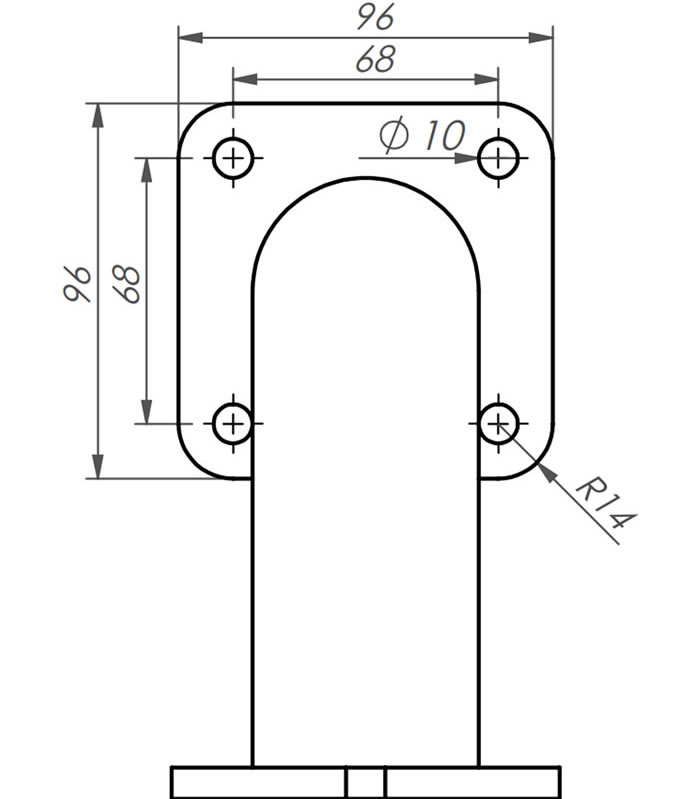
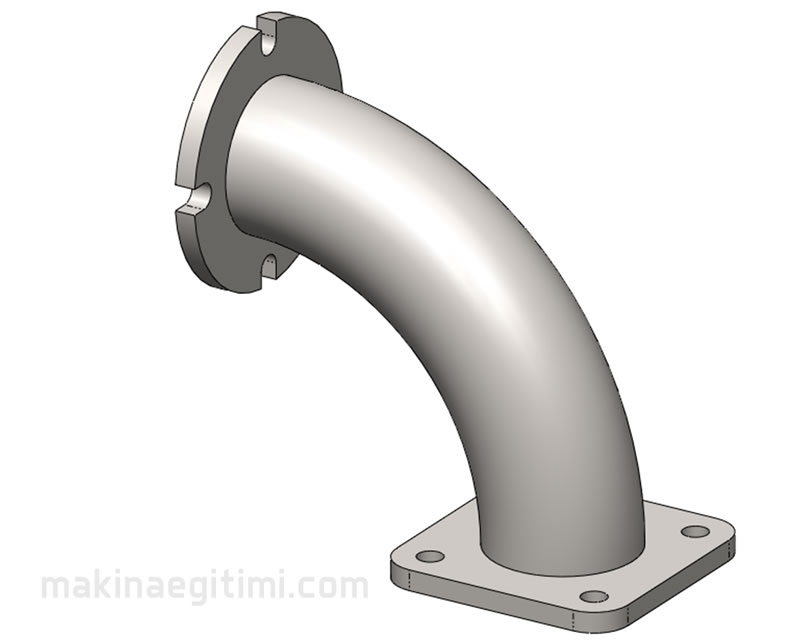
To the side, a perspective drawing and 3-view drawing of the exercise part are given. It’s in PDF format with a ready-made title block, allowing use as a school exercise.

Video Walkthrough
Illustrated Walkthrough
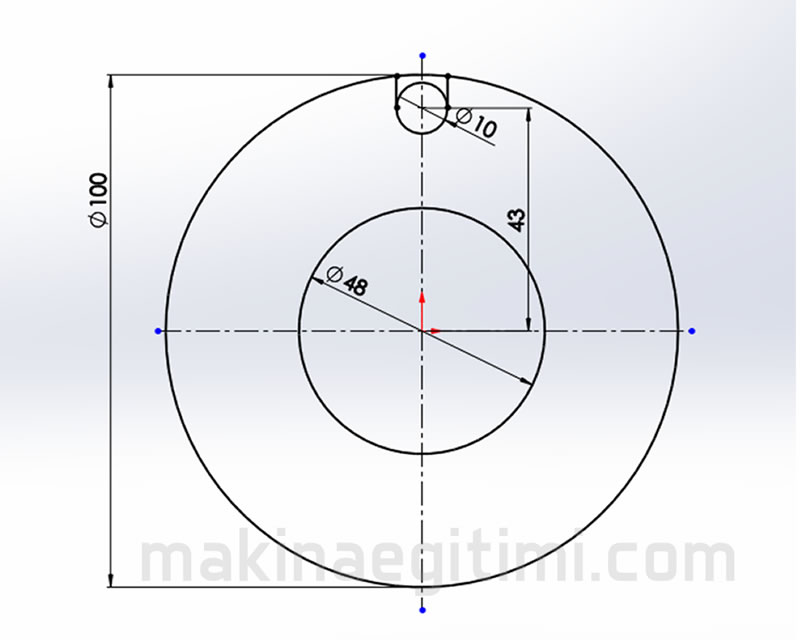
Let’s open a sketch on the front plane and, centered on the origin, draw circles of 48 and 100 mm. Then let’s draw a Ø10 circle at a distance of 43 mm, and tangent lines from the 100 mm circle to this circle.
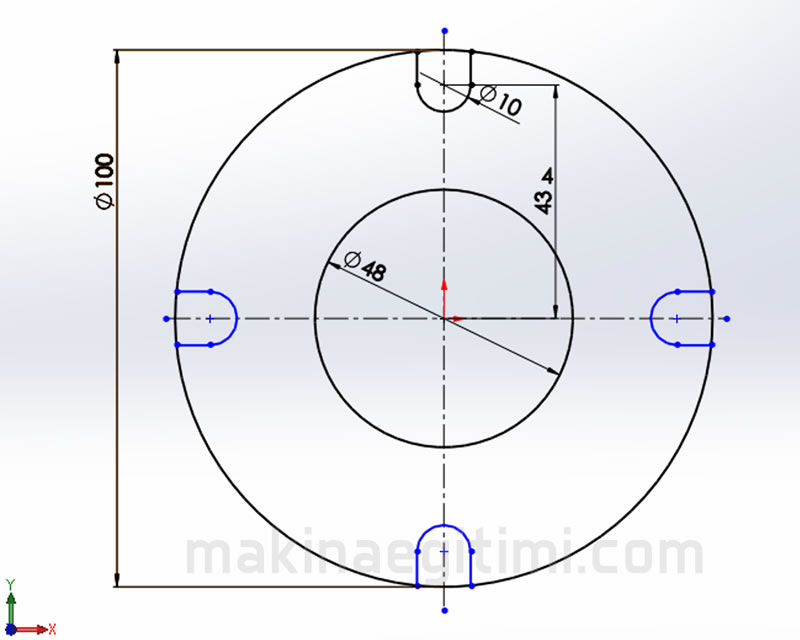
Then, using the Circular Pattern command, let’s create 3 copies of the same shape spaced 90 degrees apart. Then let’s trim the unnecessary sections.
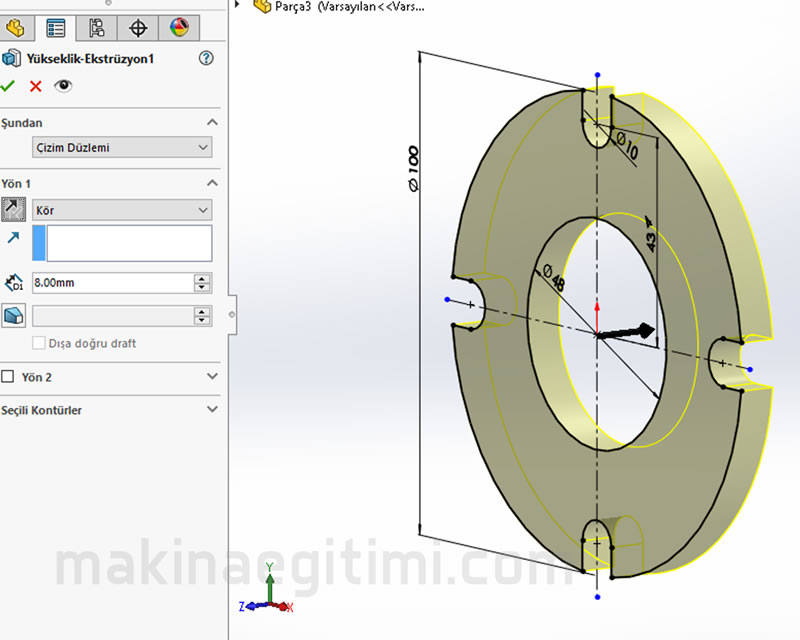
Then, using the Boss-Extrude command, let’s give this shape a thickness of 8 mm and create the solid feature.
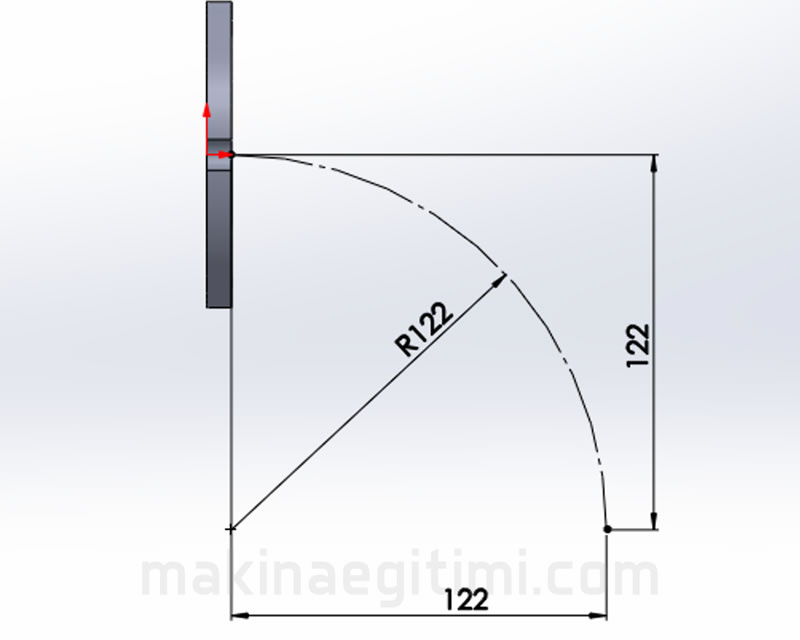
Next, let’s open a new sketch on the right plane and draw a quarter arc with a radius of 122 mm, with one end at the origin, as shown above.
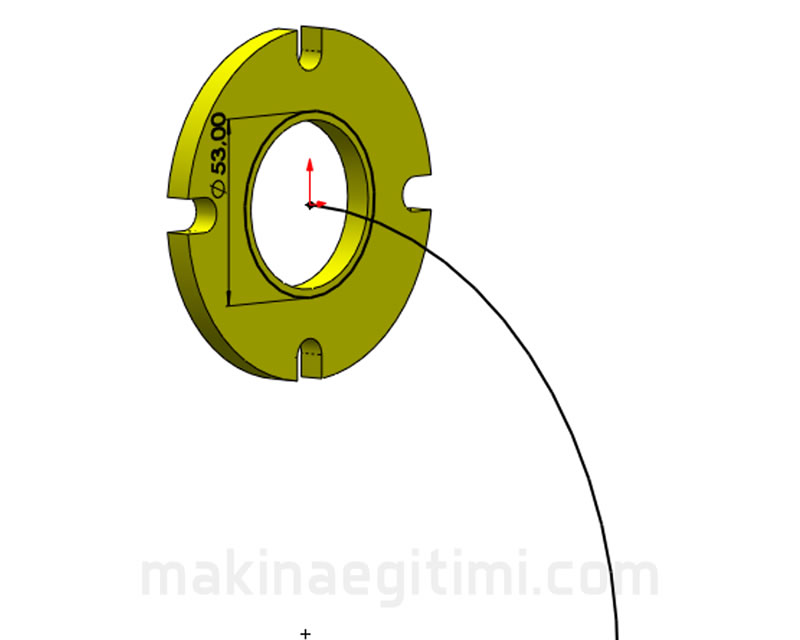
Next, let’s click on the back face of the solid feature we created and open a new sketch, then draw a circle of 53 mm. (Since the pipe’s inner diameter is 48, we drew this 53 mm circle so we could give it a wall thickness of 5 mm.)

Then let’s use the Sweep command, and first (while the blue field is active in the left menu) select the circle we just drew, then (while the pink field is active in the left menu) select the 122 mm radius arc. Let’s not forget to check the THIN FEATURE option.
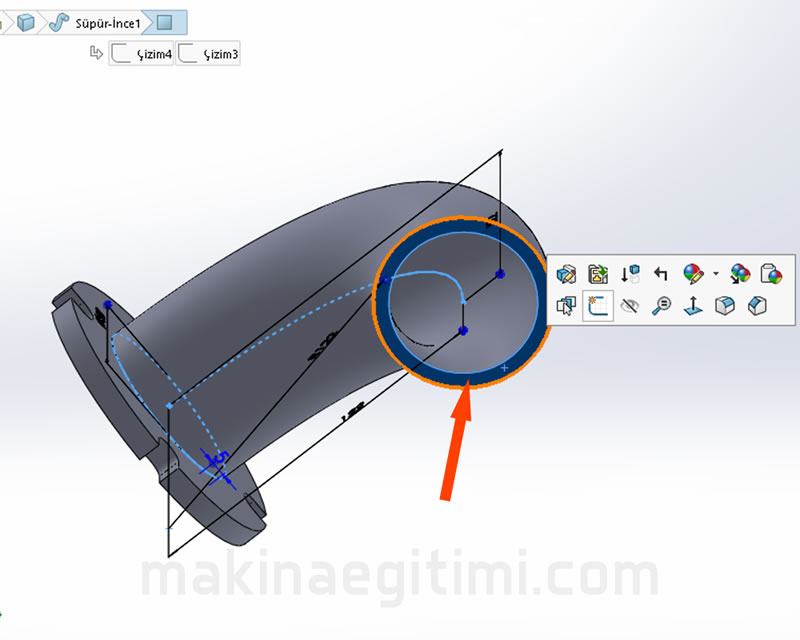
Then let’s rotate the part as shown above and open a sketch on the face indicated by the arrow. Here we’ll create a new solid feature.
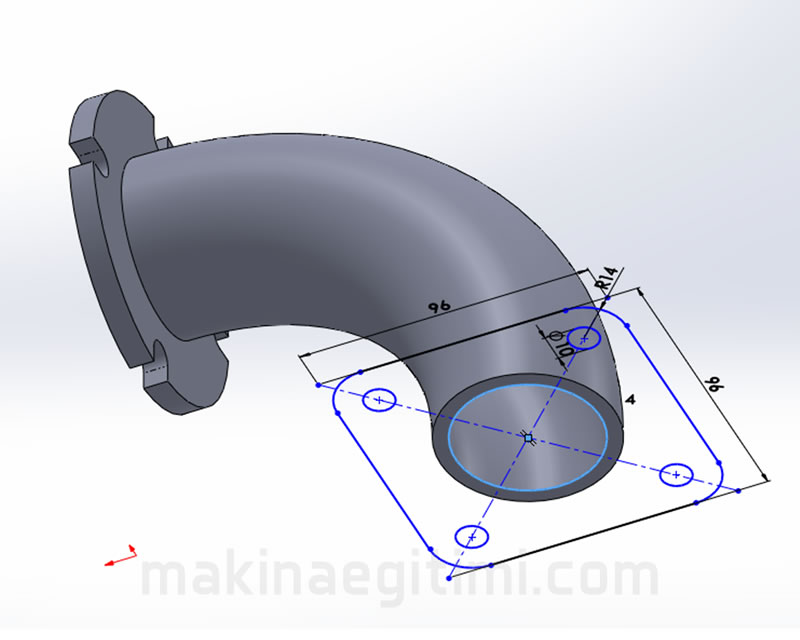
Then, after drawing the shape shown above, let’s give it a thickness of 8 mm using the Boss-Extrude command. Our solid model will be ready.
Related Posts
 How Was It Made in SolidWorks – 1
  Download SolidWorks Solid Models of Machine Parts SolidWorks Assembly Drawings – Bevel Gear System
  SolidWorks Solid Model Exercise-7
  SolidWorks Solid Model Exercise-6
  SolidWorks 3D Simple Exercise 1
  AutoCAD 3D Drawing Exercise Example. Step-by-Step Guide
  SolidWorks Solid Model Exercise-9