
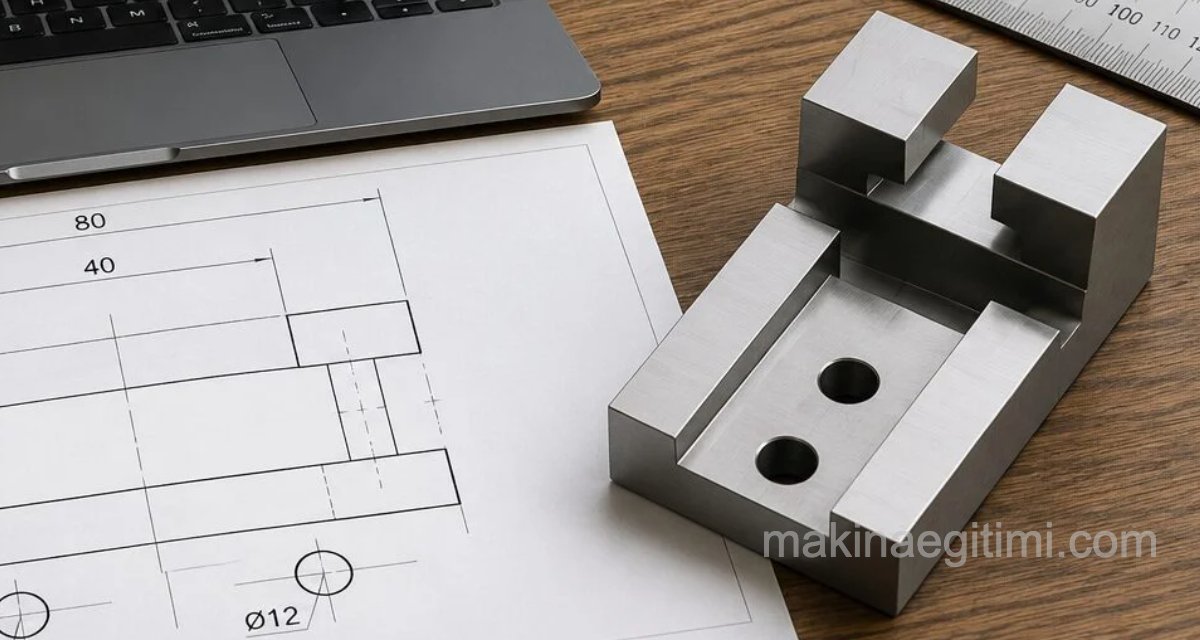
In this article, you can follow the solid model construction of the part below as a VIDEO and an ILLUSTRATED WALKTHROUGH. You can download the AutoCAD DWG, PDF, and SolidWorks SLDPRT files for this part at the very bottom.
Video Walkthrough
Related Files


Illustrated Walkthrough

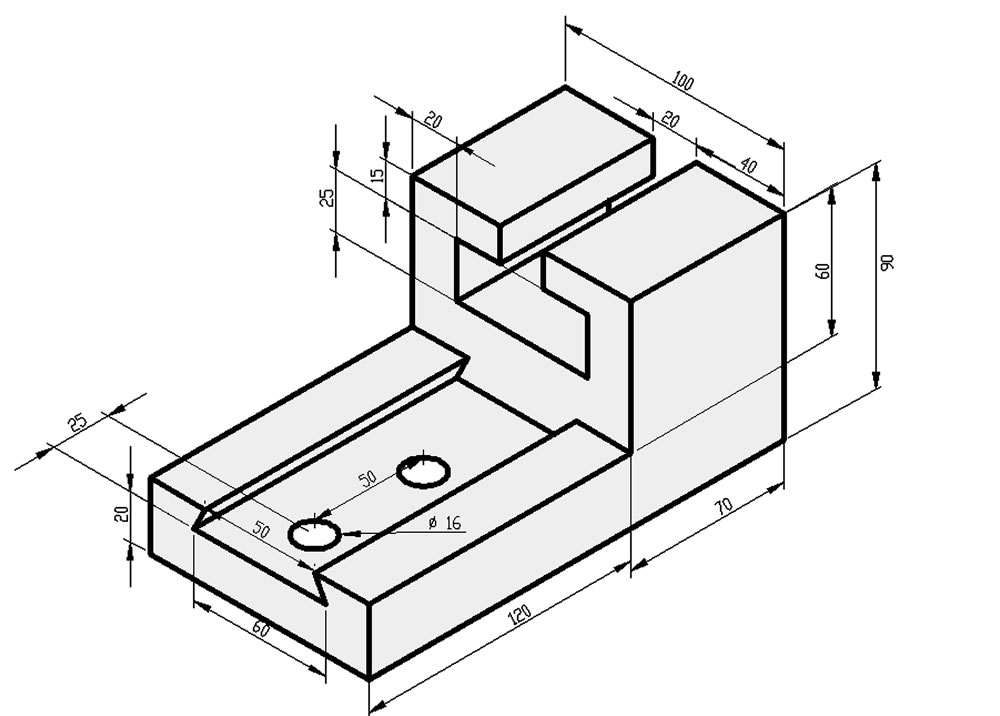
The dimensioned isometric view of the sample part we’ll be modeling. You can click the image to enlarge it.

When solid modeling in SolidWorks, deciding correctly where and how to start the drawing makes things easier. First, we need to plan which surfaces to sketch 2D geometry on, and which solid-modeling commands to use, to draw the part the easiest way.
To make correct, practical decisions on this and to develop the right way of thinking, you need to master the commands and practice with sample drawings. Looking for solutions to the problems we run into in a sample drawing, and those moments when we realize we took the wrong path and think “darn, it would’ve been better to start from that surface instead” — those are actually what builds this skill. It’s a mistake to think “I’ve learned the command, I’ll just use it” and skip practicing with sample drawings.
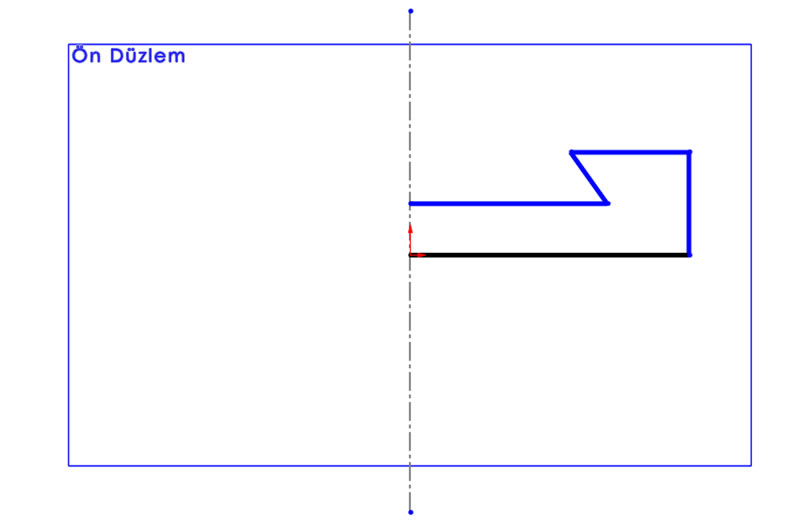
Let’s start our drawing by creating the shape above on the FRONT PLANE.

Let’s dimension it using Smart Dimension. You can click the image to enlarge it.
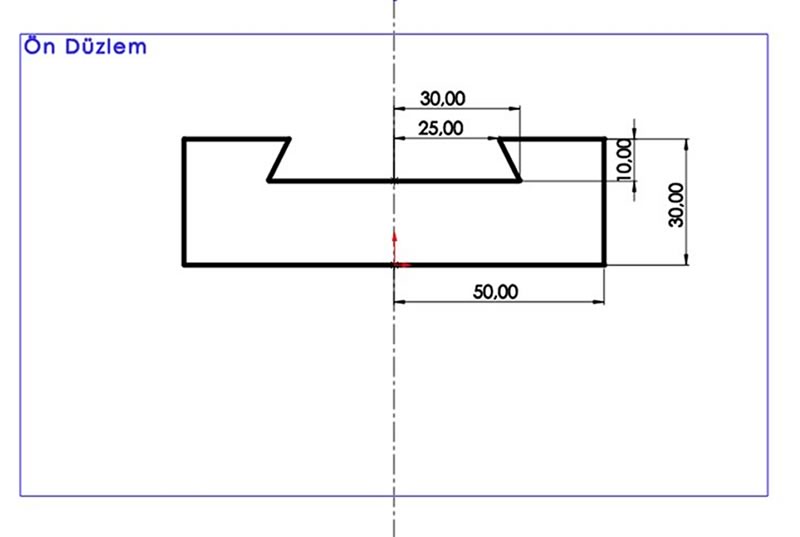
Then, using the Mirror command, let’s create a mirrored copy of our sketch about the center axis.

Next, let’s use Extruded Boss/Base to give it a depth of 120 mm.

Let’s hold down the mouse’s middle wheel to look toward the back face of our part, then click on the surface shown in blue above and start a new sketch there.

Then let’s draw the shape above and add the required dimensions using Smart Dimension.
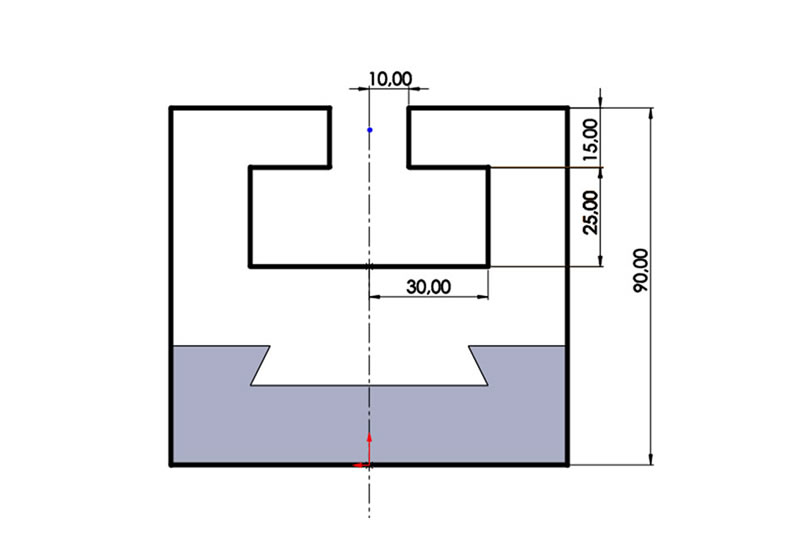
Let’s use Mirror again to create a mirrored copy of the sketch. This will give us a closed profile we can use to build a solid.
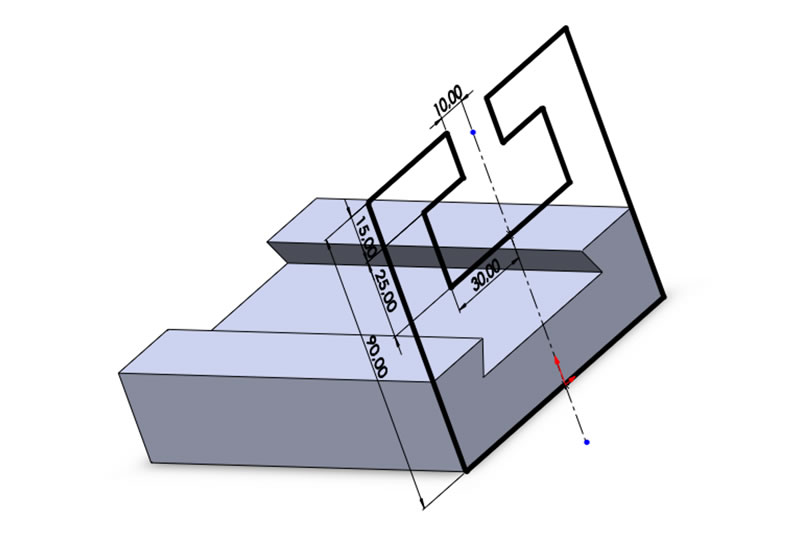
When we hold down the mouse’s middle wheel and rotate it left and right, it will look like the image above.
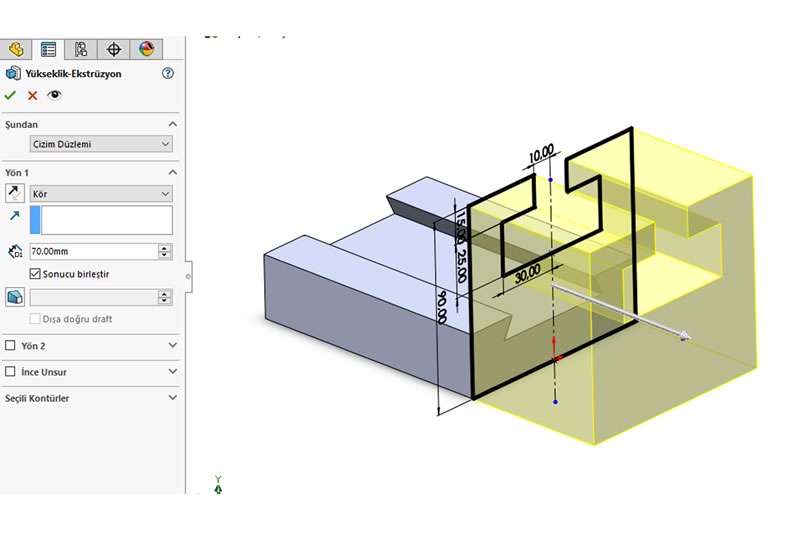
Again using Extruded Boss/Base, let’s give the last sketch we drew a depth of 70 mm.
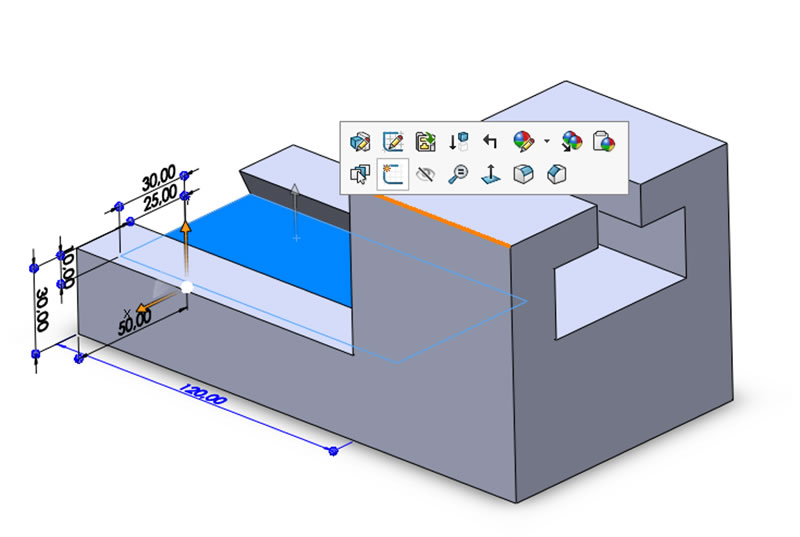
Our part is almost done. Just the holes left. We’ll draw the holes looking from the top. Let’s click on the surface we’ve shown in blue and start a new sketch.

When we start a new sketch on this surface, we’ll be looking down at our part from above. Let’s draw the holes and dimension them.

TIP: Instead of dimensioning the two holes separately, let’s first draw both holes without dimensions, select them both, and in the Relations section shown in the left-hand menu, set them as equal to each other.

Then let’s select Extruded Cut and choose Through All in the left-hand menu.
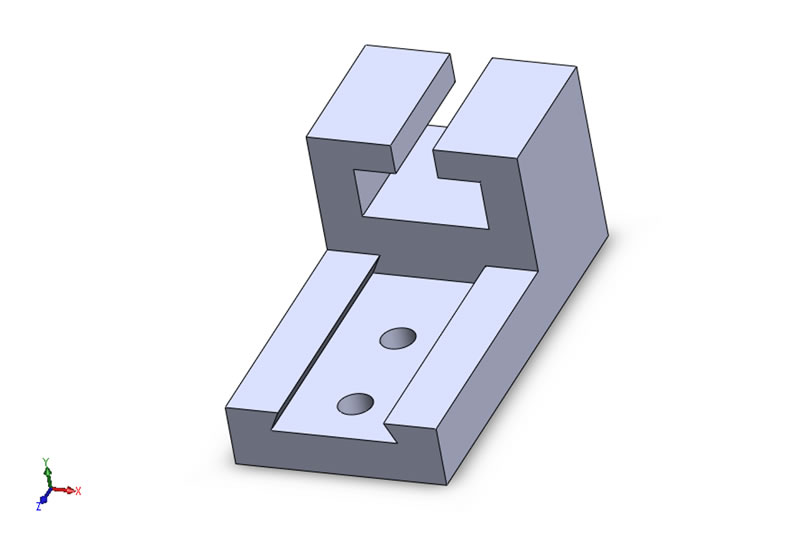
Our solid model part is ready.
REMINDER: The drawing methods and steps chosen while building this part aren’t the only way it has to be done. Depending on your experience and how comfortable you are with the commands and shortcuts, you can build the same model in different ways.
Related Posts
 SolidWorks Solid Modeling Examples
  AutoCAD Solid Model Examples
  SolidWorks Solid Model Exercise-2 SolidWorks Assembly Drawings – Bevel Gear System SolidWorks Ready-Made Drawings – Door Bolt Assembly and Detail
  SolidWorks Practical Solutions and Tips-2
  SolidWorks Solid Model Exercise-5 / Loft and Shell
  SolidWorks Solid Model Exercise-9