

In this article, we’ll look at how to use AutoCAD’s Object Snap (OSNAP) options.
Drawing precisely in AutoCAD isn’t possible without using Object Snap. These options don’t just let you draw precisely — they also speed up your drawing workflow.
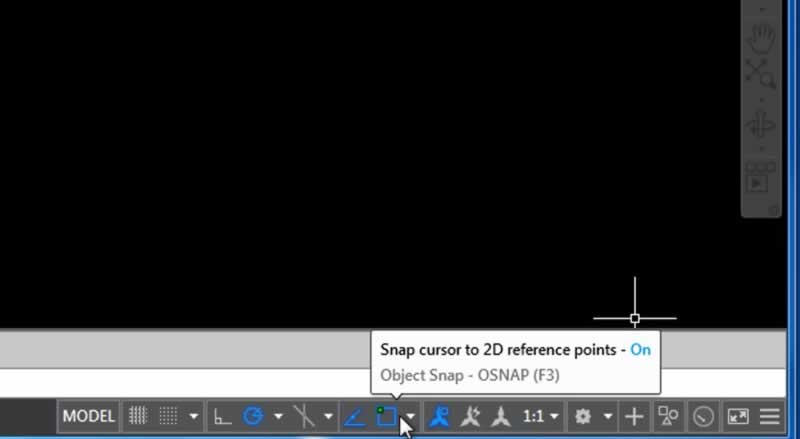
We can reach the Object Snap feature from the status bar at the bottom, as shown in the image. We can toggle Object Snap on and off using the F3 keyboard shortcut, or by clicking its icon. When Object Snap is active, the icon will be highlighted in blue.

Clicking the small arrow next to the icon brings up a menu that pops up above it. Here we see options that are either checked or unchecked. If an option has a checkmark, it’s active. We’ll go through these options one by one. You can also turn these features off by unchecking them, or by doing the same thing through the OBJECT SNAP SETTINGS entry shown at the bottom.

Clicking Object Snap Settings opens a window like the one shown above. From here, you can also check the box for whichever feature you want to activate. This window also gives you access to advanced options related to object snap and the grid.
Object Snap Functions
Let’s take a look at what the Object Snap functions actually are. By the way, we’ll write OSNAP instead of Object Snap for short.
Endpoint
The Endpoint OSNAP option lets you snap to any endpoint in your project. It’s useful when you want to create quick connections. It’s the simplest OSNAP function, and one you should generally leave active.

When the cursor shows the Endpoint snap marker, it will snap to the endpoint the moment you click, even if you’re not exactly on it.
Midpoint
The Midpoint object snap lets you snap to the midpoint of any line or arc.

With Midpoint snap selected and a drawing command active, move your cursor close to the midpoint of a line or arc. A green triangle marking the midpoint will appear, and clicking will snap exactly to that midpoint.
Center
With Center snap, you can snap to the center of any circle, ellipse, arc, or elliptical arc.

Create one of the curved objects mentioned above. To do this, make sure CENTER is checked in the OSNAP options, then choose any drawing command like LINE or CIRCLE, and move your cursor around the perimeter of the circular object.
Intersection
If you’ve turned on the Intersection OSNAP feature, you’ll be able to snap your cursor to the point where geometric objects intersect.

That said, if you don’t want Intersection to snap to some other nearby point — like a midpoint or endpoint that happens to be very close to the intersection point — you should disable the other OSNAP features besides Intersection.
Geometric Center
When you need to snap to the center point of shapes like triangles or rectangles, with Geometric Center active in the OSNAP menu, move your cursor near the perimeter of the shape. Make sure one of the drawing commands is active before moving your cursor over the object. You’ll see a star, or a white 8-pointed star, at the center, and you can easily snap to it.
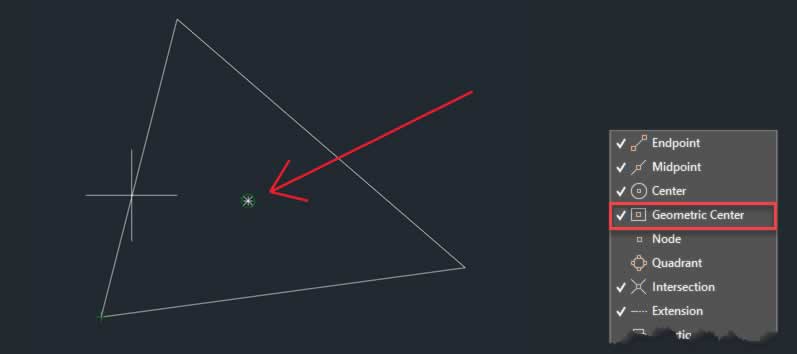
But what if you’ve already created a closed shape using only the Line tool, and you want to find its geometric center?
In that case, you can join the lines using the JOIN command, converting the closed geometry into a single object made of a polyline. The GEOMETRIC CENTER function will then work on the resulting polyline.
Node
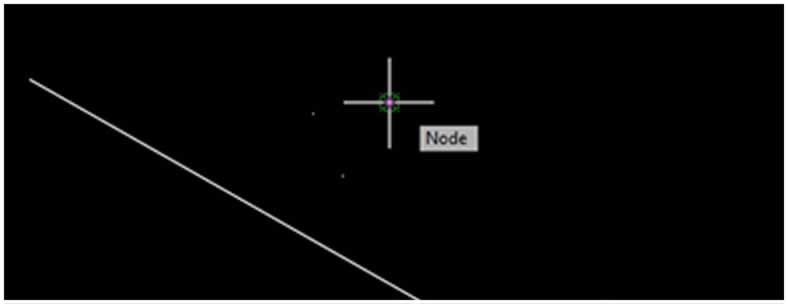
The Node feature lets you snap to single points that you’ve drawn with the POINT command.
Quadrant
The Quadrant option lets your cursor snap to the quadrant points around the perimeter of a circle, arc, or ellipse.

With the Quadrant option, we can snap to the quarter-points of these objects (at the 12, 3, 6, and 9 o’clock positions).
Tangent
A tangent point is a point where two pieces of geometry meet at exactly one point. An example of a tangent is shown in the image below.

Perpendicular
The Perpendicular option is used to place your selected line so that it sits perpendicular to another reference line in the drawing.
The Perpendicular snap will appear at the point of perpendicularity on the reference line, as shown in the video above.
Apparent Intersection
What does Apparent Intersection do?

Apparent Intersection moves your cursor to a point where two objects don’t technically intersect, but appear to intersect anyway. This kind of situation comes up when drawing on the X, Y, and Z axes in 3D space. In the image above, the two objects appear to intersect. But as we can see in the video below, when we look at the objects from different UCS planes, they don’t actually intersect.
NOTE: don’t keep Intersection and Apparent Intersection active at the same time, as this can lead to unwanted results.
Parallel
Using Parallel OSNAP is genuinely fun. This feature lets you easily draw a line parallel to any other line. Before using it, make sure Ortho Mode (toggled with F8) is turned off.
After making sure Ortho mode is off, draw a line at any random angle. Then turn off all snap options except Parallel.
Nearest
The Nearest OSNAP option lets you snap to any point along any object.
Let’s do an exercise to understand this. First, let’s draw a circle.
Then let’s choose one of the drawing commands (for example LINE) and move our cursor over the circle. We’ll see a green marker. Now let’s move our cursor around the circle’s perimeter. The cursor will keep snapping to the circle.
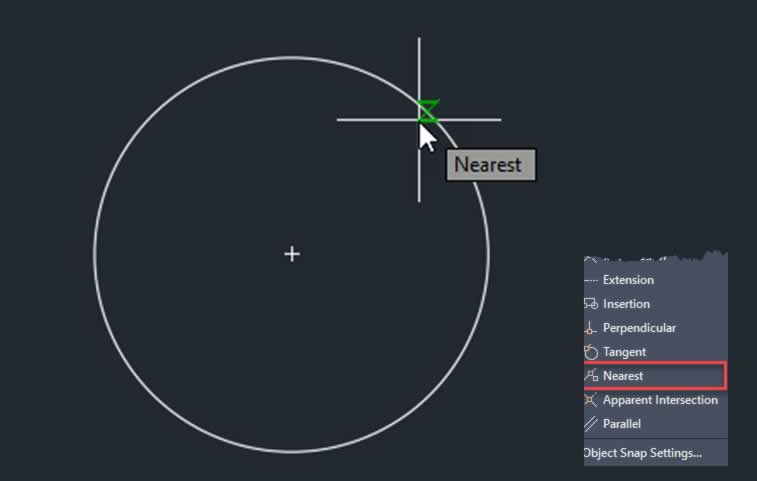
We should mention that “smart” snap options like Nearest don’t work well together with the basic snap options. For example, what use is Intersection when your cursor keeps snapping to the nearest point (with Nearest turned on)?
With that in mind, use as few snap options as possible at once. This helps guarantee maximum efficiency and the fewest errors across all your drawings.
Extension
Extension OSNAP lets your cursor snap to points that lie along the extension of a line, projected from an endpoint. Let’s see this with a video example.
Using a One-Time OSNAP Override
AutoCAD has thought of everything you might need. Besides the familiar OSNAP menu, you can temporarily disable your active OSNAP options and use a single OSNAP function just once.
To do this, choose any drawing command (for example LINE), hold SHIFT, and right-click with your mouse. A menu like the one below will appear.

Regardless of your active OSNAP options, whichever OSNAP you pick from this menu will take effect, and the others won’t apply.
Related Posts
 2D Dimensioned Drawing Examples – Part 2
  How to Add Tolerance in AutoCAD. Adding Tolerance
  How to Use the AutoCAD OFFSET Command. Example Drawings
  AutoCAD Beginner Level 2D Sketch Exercises
  Isometric Drawing and View Examples
  A Few Tricks for Productivity With AutoCAD
  How to Add a Datum Symbol in AutoCAD Dimensioning
  2D Sketch Drawing Examples – Part 4