

In this article we go through concrete adjustments that will help you bring down the total cost of your part, together with examples of printers and software actually used in the market.
3D printing offers a fast and flexible solution in many areas, from prototyping to series production. The cost per part, however, can rise more than expected depending on design and process decisions.
There are three main factors that determine cost: design, the choice of material and process, and production quantity. This article also brings together the questions most often asked in practice, and the problems most often met, by people doing both hobby and commercial 3D printing.
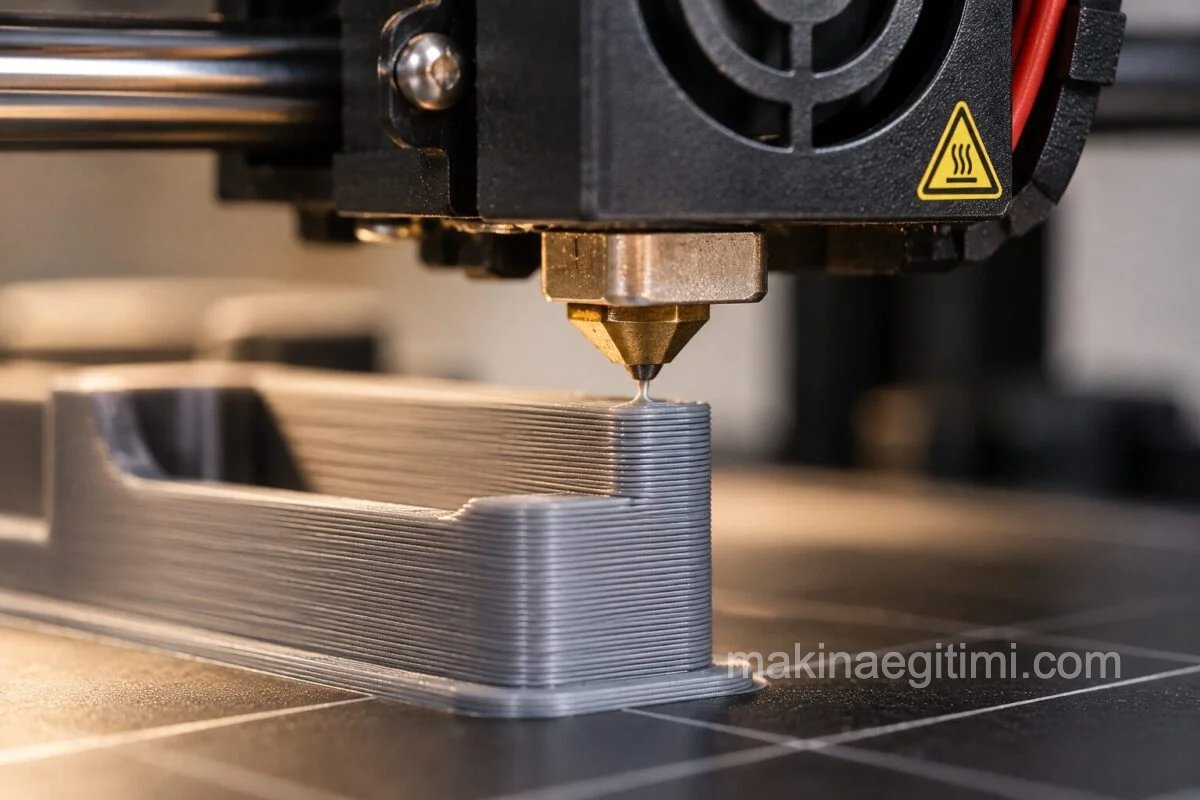
How Can Cost Be Reduced at the Design Stage?
A large part of 3D printing cost is directly related to the amount of material used and the printing time. A few changes made at the design stage can save a serious amount of both material and production time.
Set the Infill Ratio Correctly
One of the most common mistakes made in practice is using a higher infill ratio than necessary. The infill ratio determines what percentage of the inside of the part will be solid, and it directly affects filament consumption, printing time and cost. The recommended infill ratios by intended use are as follows:
| Intended Use | Recommended Infill |
|---|---|
| Decorative, visual model | 5-15% |
| General purpose everyday object | 15-25% |
| Light functional part | 25-40% |
| Part carrying a mechanical load, bracket | 40-60% |
| Engineering part working under heavy load | 80-100% |
Reducing the infill ratio from 20% to 10% can cut filament cost on a decorative print by between 15% and 25%, and the loss of strength usually stays at a negligible level. The infill pattern matters too.
The gyroid pattern is widely preferred in slicers such as PrusaSlicer and Bambu Studio, because it offers balanced strength in every direction even at low infill ratios. For visual models, PrusaSlicer’s “Lightning” infill type also stands out for saving material.
There is one more point worth noting: raising the infill ratio is not always the way to increase strength. In most cases, increasing the number of walls (perimeters) from 2 to 3 or 4 gives more strength than raising the infill from 20% to 50%, and uses less material, because walls print faster than infill.
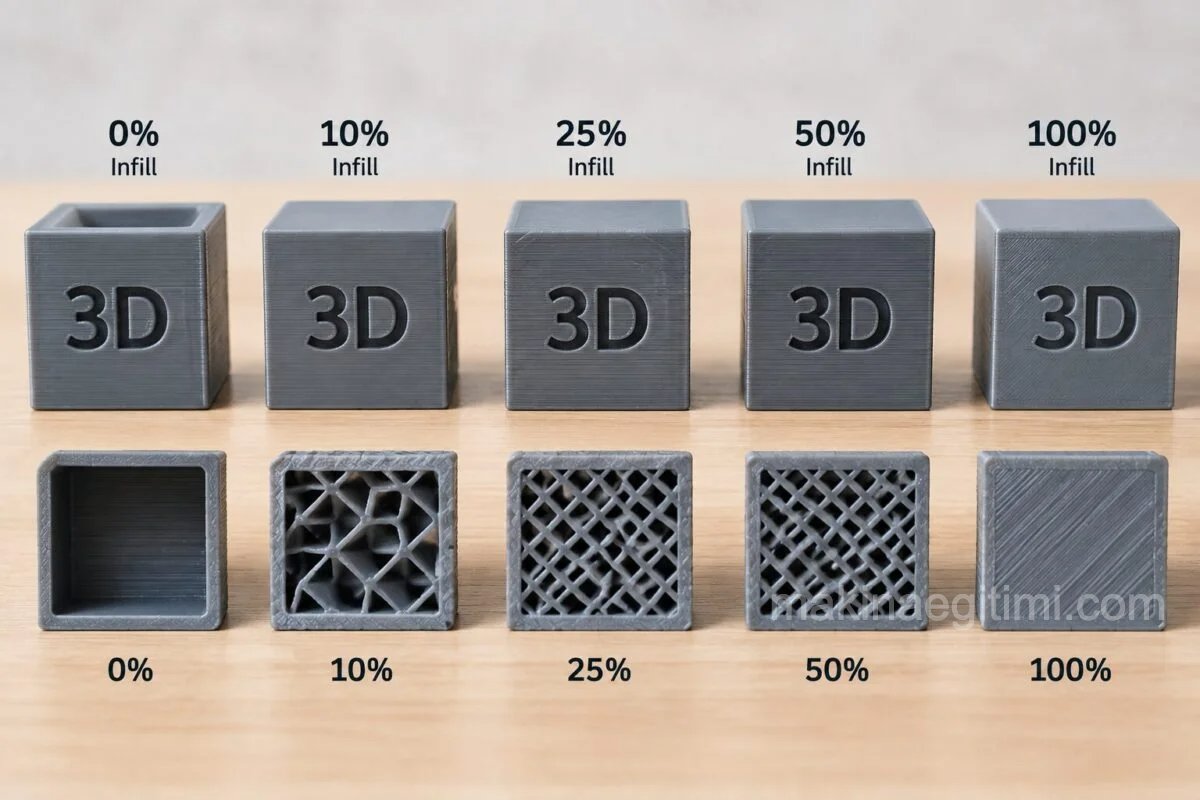
Hollow Out the Part
One of the most effective ways of reducing the amount of material used is to hollow out the centre of the design and leave only an outer shell. When applying this method it is necessary to pay attention to wall thickness, because a shell left too thin can cause the part to lose its structural integrity.
In SLA resin printing, on printers such as the Formlabs Form 3+ or the Elegoo Saturn, hollowing out the model and adding drain holes brings resin cost down considerably. If you are using a powder-based process such as SLS, do not forget to add escape holes to the design so that the powder in the hollowed area can get out; otherwise the powder stays trapped inside the part.
Optimise Part Size and Layer Height
Part size is directly related to the amount of material used and the printing time. If you are producing a proof of concept, reducing the size of the model lowers both cost and lead time. Layer height has a similar effect.
On technical parts where visual detail is not critical, using a layer height of 0.28 to 0.3 mm instead of 0.2 mm can cut machine time almost in half. In the same way, using a 0.6 or 0.8 mm nozzle instead of the standard 0.4 mm one significantly reduces printing time on large parts with coarse geometry, without giving up much quality.
Keep Support Structures to a Minimum
Reducing the amount of support a part needs saves both material and post-processing time. With methods such as FDM and SLA, removing support structures can be a difficult and time-consuming job, and badly set supports can damage the surface of the part. A few methods that work in practice are as follows:
- Orienting the part so that overhanging surfaces stay below 45 degrees often removes the need for supports altogether.
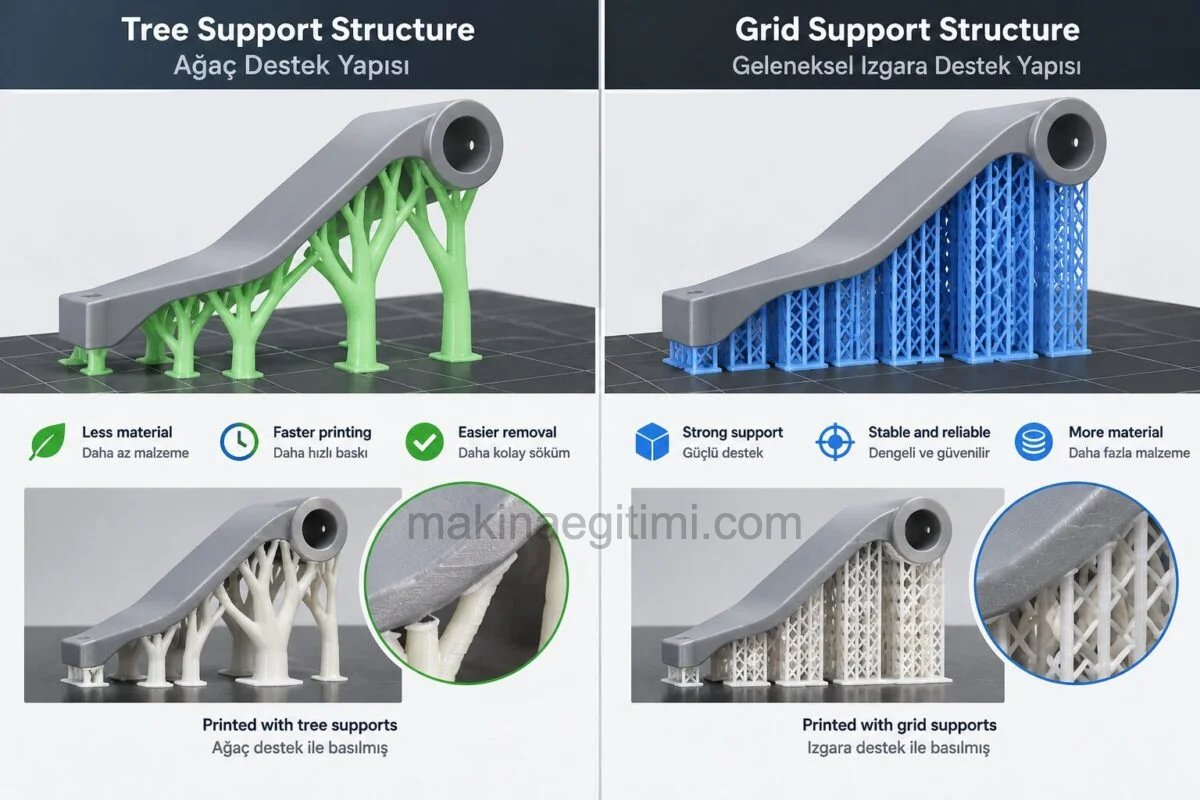
- The “tree” support mode offered by slicers such as Bambu Studio and PrusaSlicer uses up to 40% less material than traditional grid supports and separates more easily.
- Professional software such as Autodesk Netfabb minimises support structures automatically, saving both time and money.
- With the SLS method there is no need for a separate support structure at all, because the part is naturally supported by the powder surrounding it during printing. This is one of the main reasons industrial powder-based systems such as HP Multi Jet Fusion and EOS are preferred for small series production.
How Do Material and Printer Choice Affect Cost?
Choosing the right material and printer stops you spending more than you need to. If you are only testing the shape of a prototype, for example, there is no need to print in stainless steel powder when a simple, economical thermoplastic will do.
Filament and Material Price Ranges
As of September 2026, the approximate per-kilogram prices of FDM filaments in common use in the Turkish market are as follows, in Turkish lira (they can vary by brand and quality):
| Material | Approx. Price (TRY/kg) | Area of Use |
|---|---|---|
| PLA | 300-600 | General purpose, decorative, prototype |
| PETG | 400-700 | Parts resistant to moisture and impact |
| ABS | 350-650 | Heat-resistant, mechanical parts |
| TPU (flexible) | 500-900 | Flexible gaskets, cases |
| Nylon | 800-1500 | Parts requiring high strength |
These figures are given as examples, and the current market price varies with brand, exchange rate and supplier. By comparison, the per-kilogram cost of the stainless steel or nylon powder used for SLS is often several times that of FDM filament. Choosing the material according to the real needs of the project is therefore one of the biggest sources of saving.
Which Printer Suits Which Job?
There are many printers on the market addressing different budgets and levels of need. For example:
- Hobby and low-volume production: Models such as the Bambu Lab A1 and the Creality K1 offer affordable, fast printing.
- Mid-range and engineering use: The Bambu Lab P1S and the Prusa MK4 stand out with wider material compatibility (PETG, ABS, carbon fibre reinforced filaments).
- High detail and resin printing: The Formlabs Form 3+ and the Elegoo Saturn series produce high resolution parts with SLA/DLP technology.
- Industrial and series production: HP Multi Jet Fusion and EOS P series SLS systems require a high initial investment, but they bring the unit cost down dramatically in high-volume production.

Choosing the right printer directly affects both the print failure rate and the cost per part. To test a prototype quickly, for instance, what you need is an affordable desktop FDM printer, not a costly industrial system.
How Does Production Quantity Affect Unit Cost?
Increasing the order volume can reduce the unit cost per part. The reason is that programming the machine, setting up the part and post-processing after production all make up a fixed cost. This fixed cost is shared among all the parts as the number produced at the same time increases. Combining several parts on a single build plate (nesting) also optimises the printer’s set-up time and energy consumption.
Hidden Costs That Are Usually Overlooked
The price of filament or resin is only one part of the total cost. In commercial production the following items also have to be taken into account:
Electricity consumption: Desktop FDM printers generally consume between 100 and 300 watts, while industrial systems can go above 500 watts. On long prints, especially with materials that require high temperatures such as ABS, the cost of electricity turns into an item that cannot be ignored.
Scrap (failed print) rate: Professional producers generally use a failure rate coefficient. If one print in ten comes out faulty, a share covering that risk is added to the price of every successful print.
Depreciation and maintenance: Adding a small maintenance allowance to every printing hour, for items such as nozzle wear, belt slackening and build surface deterioration, protects both the life of the machine and profitability.
Common Problems and Their Solutions
One of the biggest hidden items that push up the cost of 3D printing is failed prints. The most frequently met problems and their practical solutions are summarised below.
| Problem | Possible Cause | Solution |
|---|---|---|
| Warping (corners lifting) | Uneven cooling of the material, bed adhesion problem | Clean the bed, set the heated bed temperature to suit the material, add a brim or raft, use an enclosed printer |
| Stringing (fine filament threads) | Nozzle oozing, high printing temperature | Calibrate the retraction settings, lower the temperature, keep the filament away from moisture |
| First layer not sticking | Bed level incorrect, surface dirty | Use automatic bed levelling, clean the bed surface with isopropyl alcohol |
| Over- or under-extrusion | Flow rate incorrect, nozzle partially blocked | Calibrate the extruder, clean the nozzle regularly |
| Support structure hard to remove | Support density too high, wrong support type chosen | Switch to tree support mode, lower the support density, use soluble support material (PVA) where possible |
| Frequent print failures, high scrap rate | Lack of calibration, low quality filament | Calibrate regularly, choose reliable filament brands, monitor long prints remotely with a camera |
Using this table as a checklist reduces both wasted material and lost time. In commercial production in particular, every failed print means a direct loss of filament and machine time.
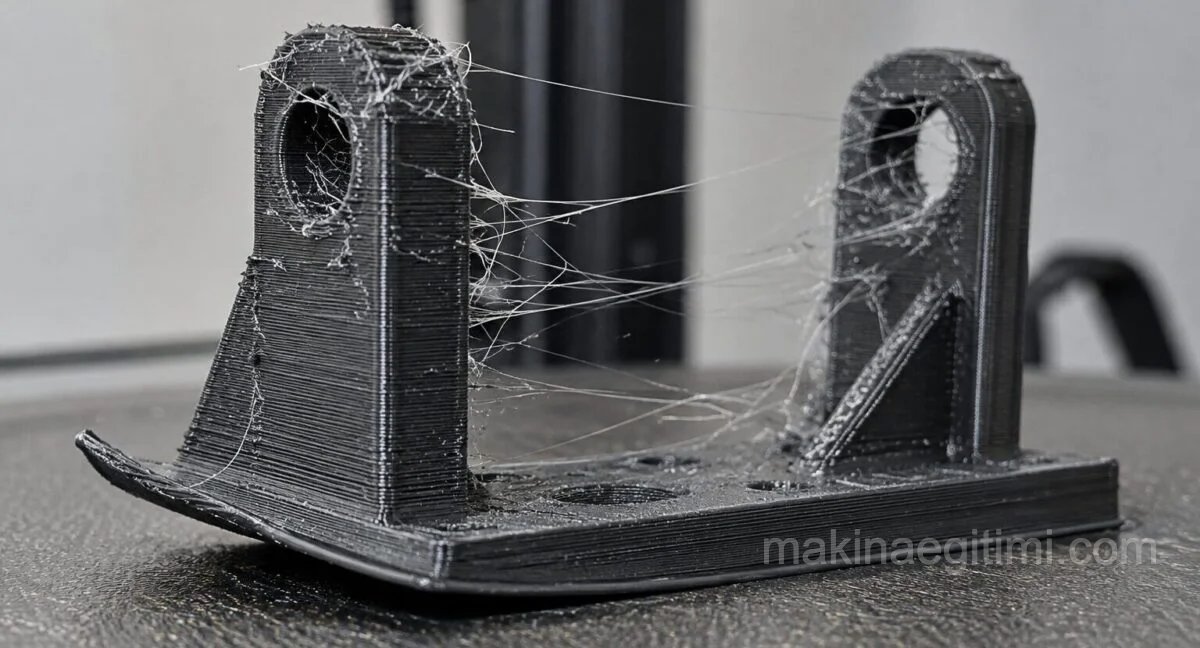
Warping: the corners at the base of the part have curled upwards, most clearly along the bottom edges. Stringing: fine, thread-like strands of filament have formed between two vertical sections and around the holes.
Related Videos
How to Lower Your Mass Production 3D Printing Costs

Use Less Filament ! | Save Filament on Infill Percentage | 3D Printing Cura Tutorial
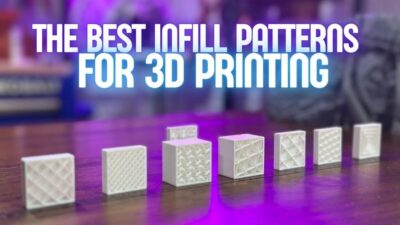
The BEST Infill Patterns for 3D Printing (And When to Use Them)
Conclusion
There is no single magic formula for reducing 3D printing cost, but small adjustments in design, infill ratio, material and printer choice add up to a big difference.
Setting the infill ratio according to actual need, keeping support structures to a minimum, choosing the right material and printer, increasing the production quantity where possible and preventing common printing faults in advance can all reduce cost considerably, in both hobby and commercial 3D printing projects. Applying these steps according to the requirements of your own project helps you protect your budget and speed up the production process at the same time.
Frequently Asked Questions
The amount and type of material used, the infill ratio, support structures, printing time and production quantity are the most important factors determining 3D printing cost.
On decorative and non-functional parts, the effect of lowering the infill ratio is usually negligible. On parts that carry a mechanical load, however, increasing the number of walls while lowering the infill is a more effective way of preserving strength.
For most general purpose use, PLA is both the most economical filament type and the easiest to print. Materials such as PETG, ABS and nylon offer higher strength, but their prices rise accordingly.
Yes. Mid-range printers such as Bambu Lab or Prusa can, with correct calibration and material choice, produce prints of adequate quality for many commercial products. Industrial systems are generally preferred for projects that require high volume or special materials.
Calibrating regularly, using reliable filament and monitoring long prints remotely with a camera all reduce the failure rate considerably. Some printers, such as the Bambu Lab X1 Carbon, can stop the print automatically with AI-assisted failure detection.
Related Posts
 Parts of a Waterjet – What Each Part Does
 Advantages and Disadvantages of Laser Welding
 Laser Cutting Working Principle, Advantages and Disadvantages
 Types of Lasers – Properties and Applications
 What Is Dielectric Fluid, What Does It Do, Where Is It Used?
 Electrical Discharge Machining (EDM) Machines
 Industrial 3D Scanners
 What Can a Waterjet Cut? What Can It Not Cut?