
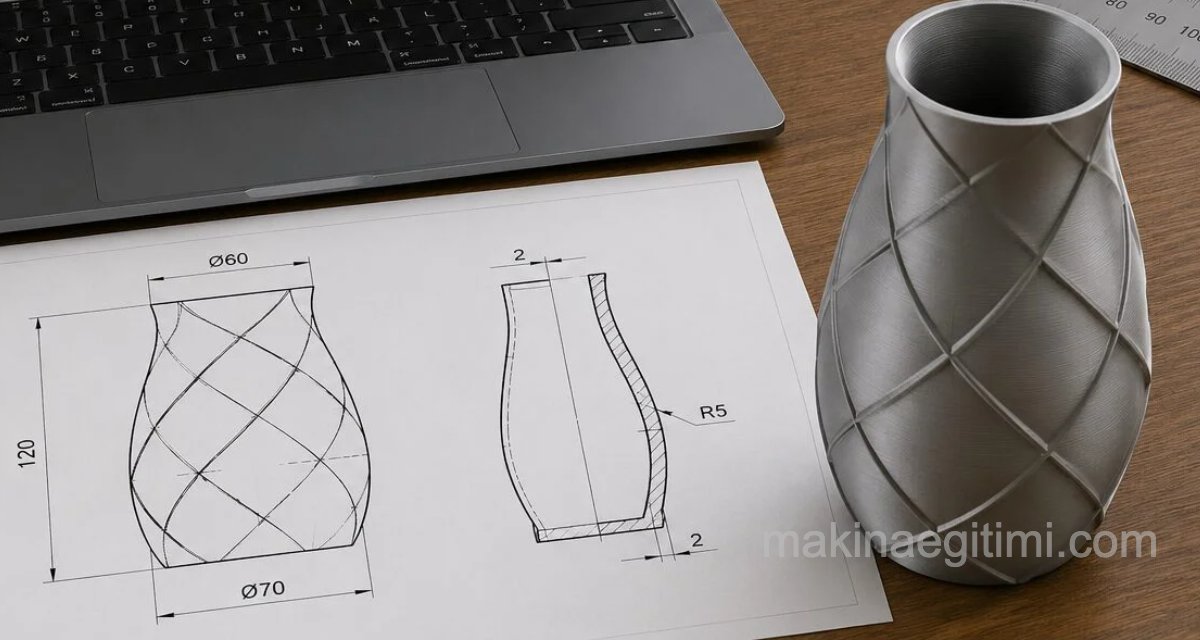
SolidWorks Practice Exercise. Creating a solid with Loft. Offsetting a plane using reference geometry. The Shell command. Surface appearances and basic lighting
Video Tutorial
Illustrated Tutorial

First, let’s open a sketch on the front plane and draw a circle with an 85 mm diameter.
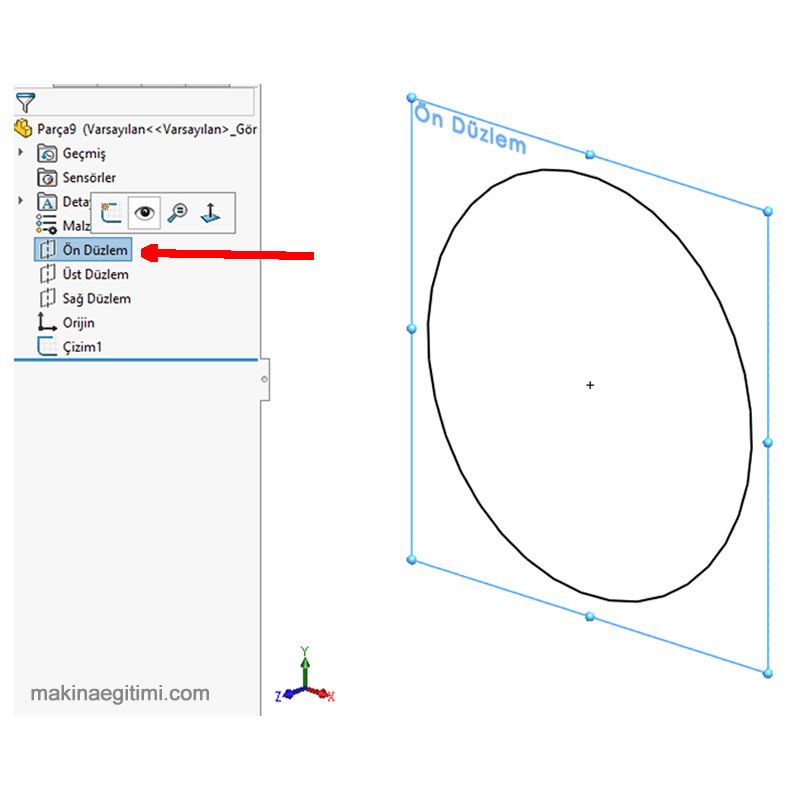
Next, let’s go to the feature tree, select the front plane, and make it visible

With the front plane selected, let’s choose PLANE from the REFERENCE GEOMETRY button under the Features menu. We’ll create a plane parallel to the front plane. Let the distance between the planes be 80 mm. (Shown in red in the image)

Let’s confirm the operation, then select the front plane again and repeat the process. This time, however, the offset direction will be reversed. (Shown by the red line)
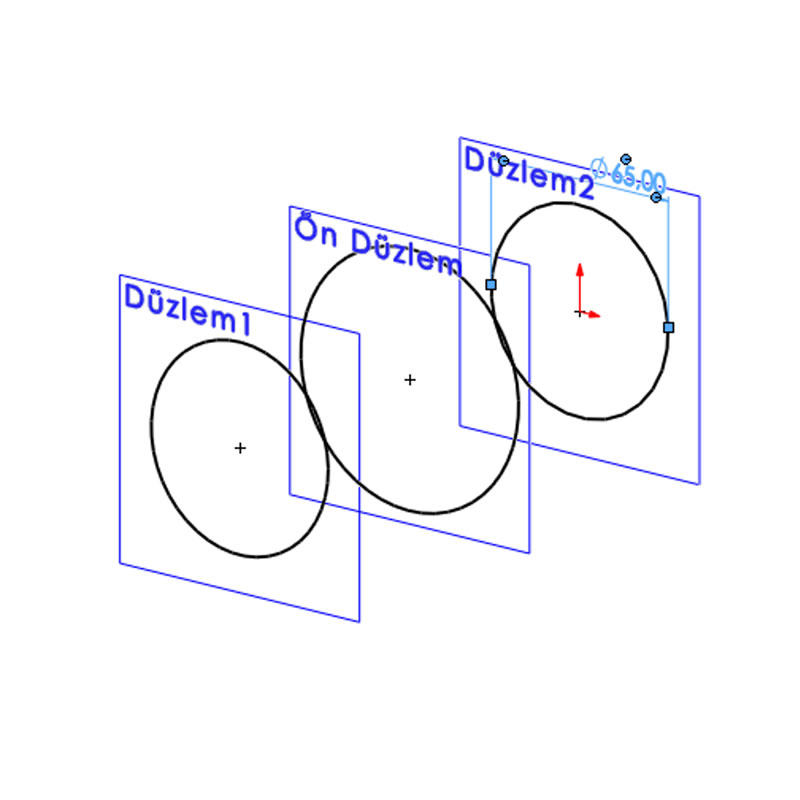
Let’s open a sketch on each of these planes we’ve created and draw circles with a 65 mm diameter. Let the center of the circles be at the center of the plane.

Next, let’s exit the sketch and select LOFTED BOSS/BASE from the Features menu, then click once on each of the circles we created. A yellow preview will appear, as shown in the image.

Without exiting the preview, meaning before confirming the command, let’s click and drag the green point on the shape to give the vase’s mouth a form. Then let’s confirm the command.

Next, let’s select the SHELL command, again from the Features menu. Then let’s click the face marked with number 1. Let’s enter the thickness in the area marked with number 2.
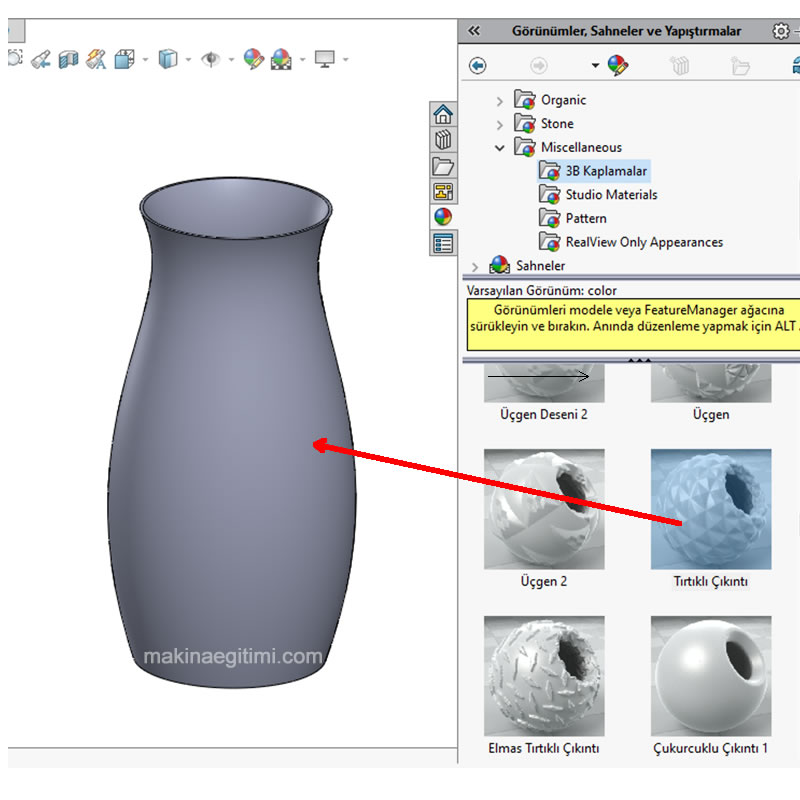
Once we confirm, our part will be hollowed out inside. Then, in the menu on the right, let’s choose an appearance material to our liking from the area shown in the figure.
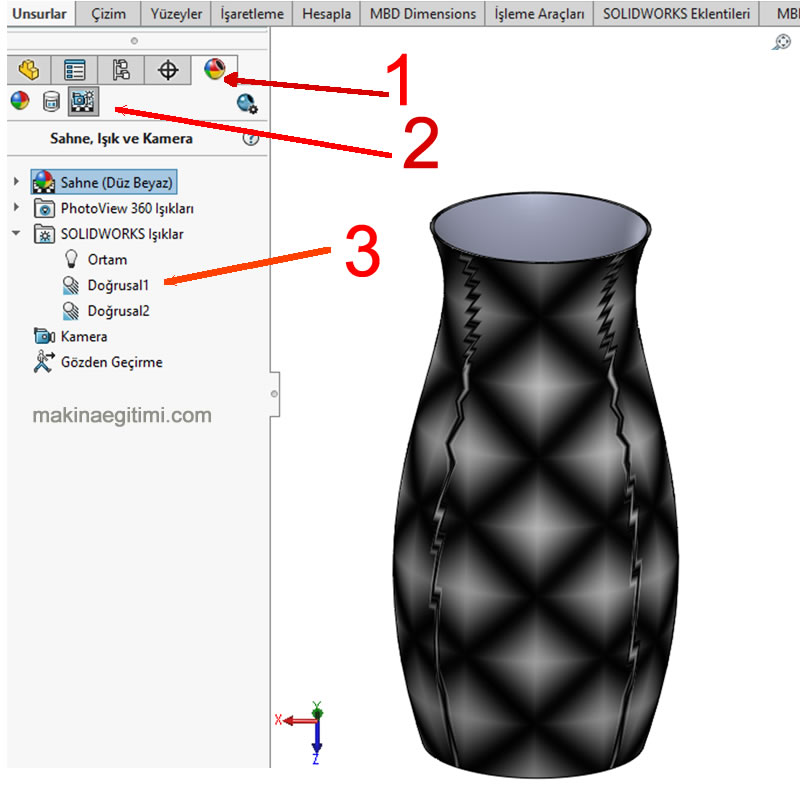
Then, in the features area on the left, let’s go into the tabs marked 1 and then 2. Let’s select one of the linear lights.

In the menu that opens, we’ll see a button where we can choose the light’s color. Let’s choose red here. We’ll also see a handle attached to the part’s surface. We adjust the direction of the light by dragging this handle left, right, or forward.
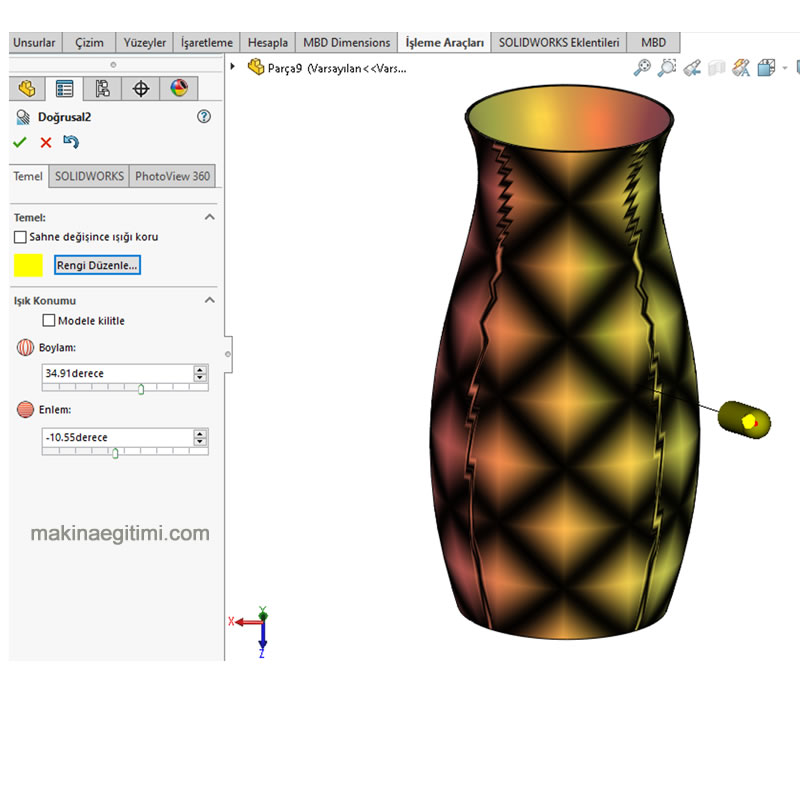
Let’s do the same with a second linear light source, and this time choose yellow for its color. Let’s move the handle attached to the part to the front right.
Related Posts
 SolidWorks Sample Solid Model Drawing -3 / Video + Document
  SolidWorks Assembly Work – Transmission System
  SolidWorks Assembly Drawings – Live (Rotating) Center SolidWorks Ready-Made Drawings – Door Bolt Assembly and Detail
  SolidWorks Solid Model Exercise-9
  SolidWorks Solid Modeling Examples
  SolidWorks Solid Model Exercise-2
  SolidWorks Solid Model Exercise-8 / Sweep