

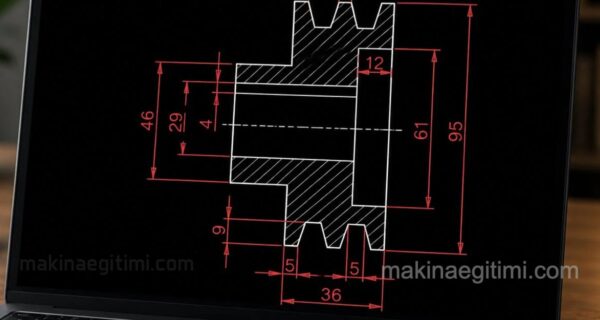
This post includes an example drawing exercise you can use for your AutoCAD practice. You can follow the drawing step by step, either with images or video, using AutoCAD commands such as CIRCLE, LINE, TRIM, EXTEND, ARRAY, and OFFSET.
Video Walkthrough
Alternative link for the video
Illustrated Step-by-Step Walkthrough

STEP 1 / Let’s start our drawing by drawing circles with radii of 15, 22, 30, and 40 mm

STEP 2 / Using the LINE command, let’s draw a line along the center direction between the R22 and R30 circles.

STEP 3 / Using the OFFSET command, let’s offset the line we drew by 6 mm to both sides.

STEP 4 / Let’s trim the excess parts of the lines we offset on both sides using the TRIM command.

STEP 5 / Let’s use the EXTEND command to extend the lines we offset on both sides to the circle below.

STEP 6 / Let’s delete the first line we drew, and trim with TRIM until the drawing looks like the one above.

Step 7 / Let’s use the ARRAY command (with the Polar option) to create a circular array. Now there’s just one step left — trimming the base sections of the teeth we duplicated.

STEP 8 / Once we trim away the excess using the TRIM command, our drawing is complete. All that remains is dimensioning.
Related Posts
 Isometric Drawing and View Examples
  How to Use the AutoCAD OFFSET Command. Example Drawings
  AutoCAD Object Snap (OSNAP) Options and Usage
  How to Add a Datum Symbol in AutoCAD Dimensioning
  SolidWorks Assembly Example – Differential Gears
  How to Add Tolerance in AutoCAD. Adding Tolerance
  2D Dimensioned Drawing Examples – Part 2
  2D Sketch Drawing Examples – Part 5